Epochs Manager
See also
In the Extended Matrix language manual:
Canvas, epochs and the time axis — how epochs are formalised on the canvas and the chronological axis.
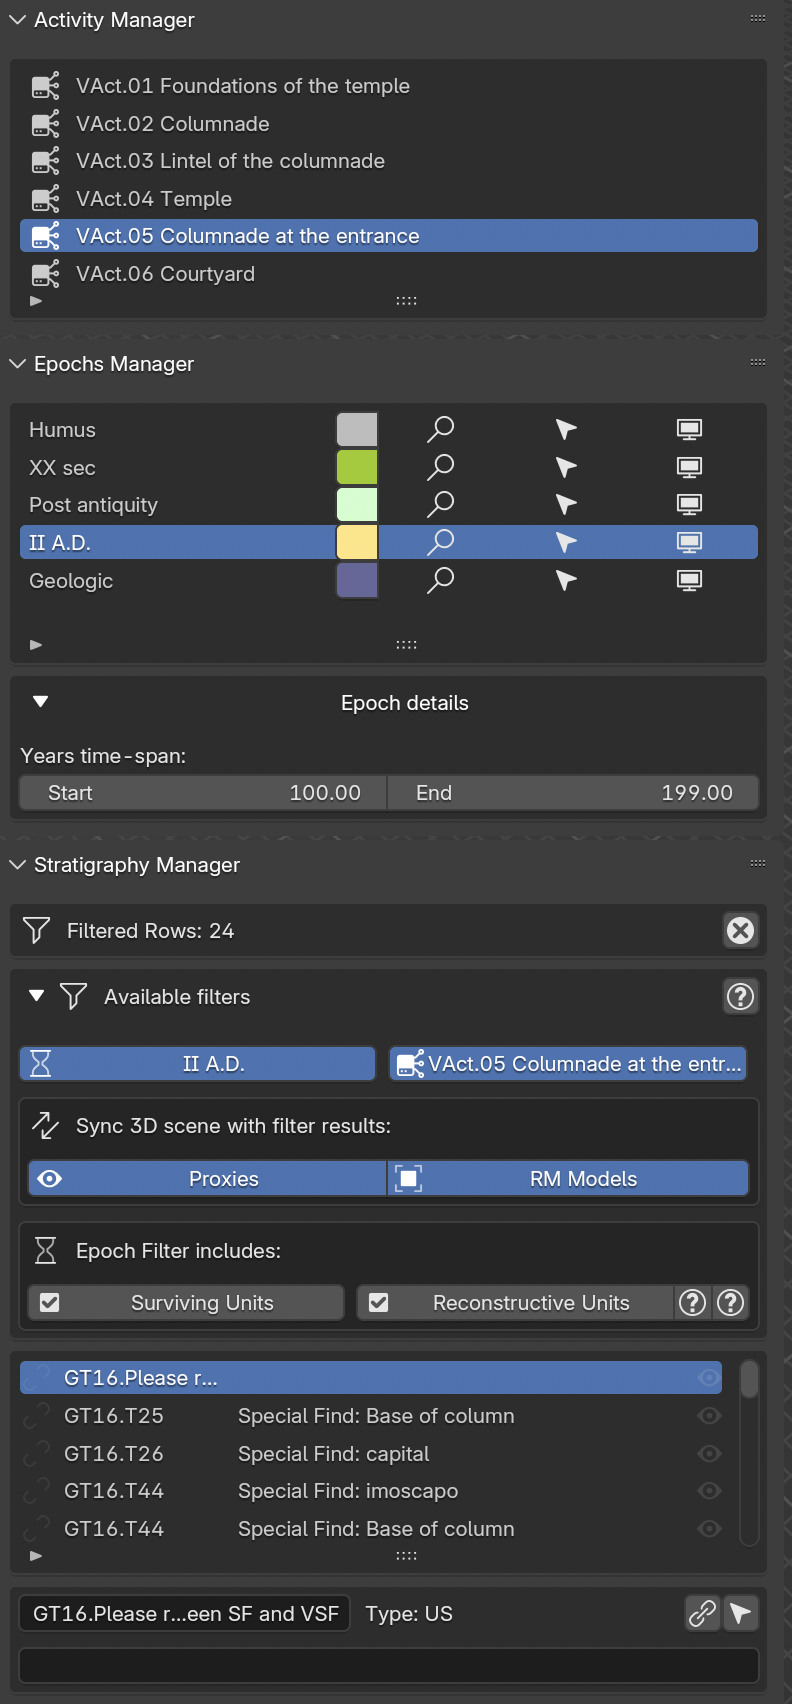
Fig. 54 Epochs Manager panel
Note
Assembling epoch-specific scenes
This panel composes scene snapshots filtered by epoch — showing only the stratigraphic units (and their proxies) that belong to a given chronological phase. The matrix provides the timeline backbone; this panel projects a single slice of it as a self-contained 3D scene, ready for screenshots, animations, or publication. The output is reproducible: re-running the assembly on the same epoch always yields the same scene.
Within this panel epochs are listed following the order indicated in the EM graph. For every epoch the tool automatically shows the corresponding colors.
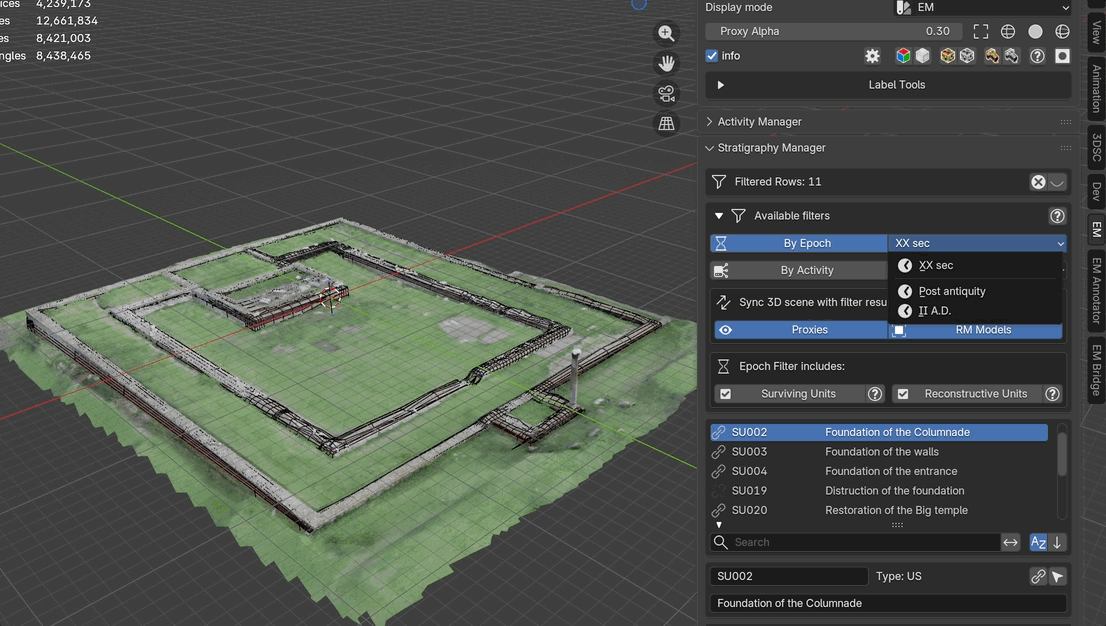
Fig. 55 Epoch filtering demonstration
Panel Layout
Epoch List:
Each row in the list displays:
The epoch name (editable)
A color swatch: click to change the epoch color
Select toggle: selects all proxies belonging to this epoch in the 3D viewport
Selectability toggle (lock icon): locks or unlocks the selection of proxies in this epoch
Visibility toggle (eye icon): shows or hides all proxies belonging to this epoch
Epoch Details (collapsible):
When an epoch is selected, time-span data is displayed:
Startvalue (year)Endvalue (year)
To visualize these time values, user must indicate the time-span for every row of the EM within the first cell (example: II A.D. [start:100;end:199]).
Epoch Lighting (collapsible):
Each epoch can have custom HDR lighting applied to the scene:
Custom Lightingtoggle: enables per-epoch lightingHDR Path: file path to an HDR image for environment lightingHDR Rotation: rotation angle in degrees for the world environmentHDR Intensity: brightness multiplier for the HDRApply Epoch Lightingbutton: applies the custom HDR environment to the scene
Note
If custom lighting is enabled but no HDR image path is set, a warning message appears in red.
Workflow
Filtering by epoch:
The selections made within the Epochs Manager are used to enable the epoch filter in the Stratigraphy Manager panel. Select an epoch, then enable the By Epoch toggle in the Stratigraphy Manager to filter the stratigraphy list.
Controlling proxy visibility:
Use the visibility toggle (eye icon) on each epoch row to show or hide all proxies belonging to that epoch. Use the selectability toggle (lock icon) to prevent accidental selection of proxies in specific epochs.
Applying custom lighting:
Select an epoch in the list
Expand the
Epoch LightingsectionEnable
Custom LightingSet the path to an HDR image file
Adjust rotation and intensity as needed
Click
Apply Epoch Lightingto update the scene environment
See also
The Filter System section in the Stratigraphy Manager documentation for details on epoch-based filtering and its interaction with other filters.