Visual Manager
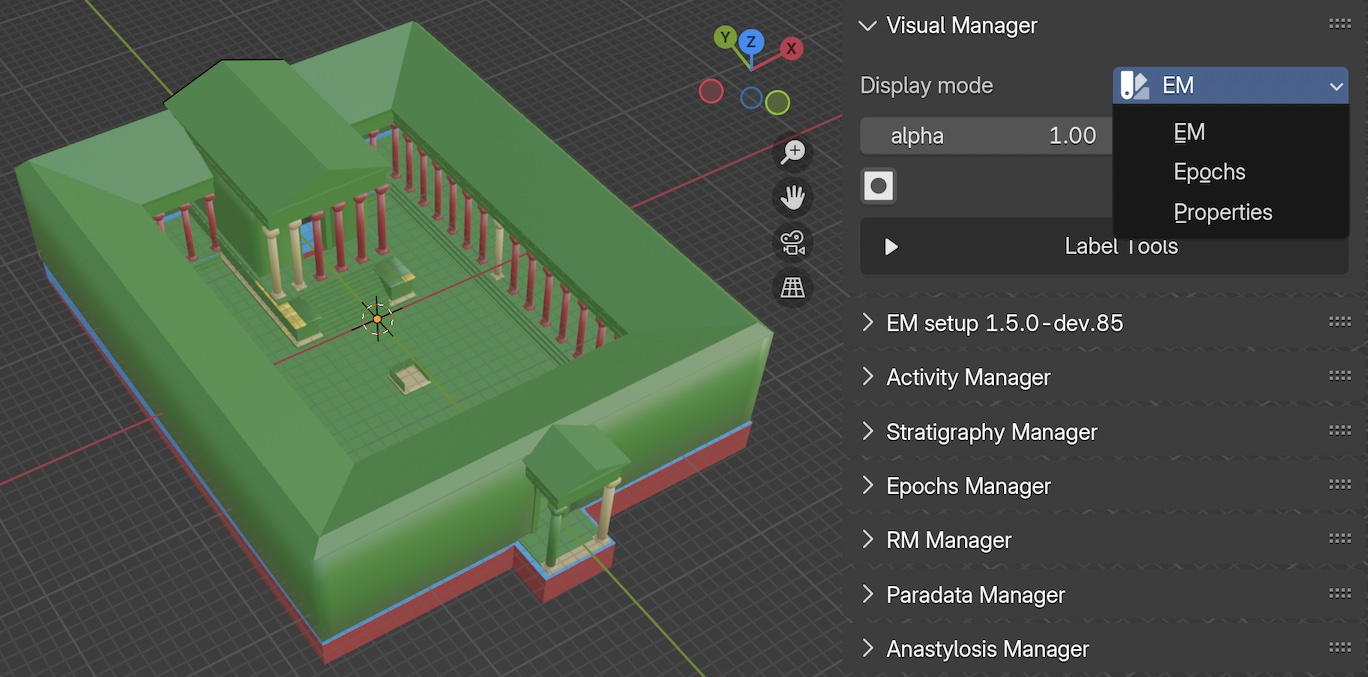
Fig. 59 Visual Manager modes (EM, Epochs, Properties)
This panel (Fig. 59) consents to manage the appearence of the so-called Proxy models (or Proxies) in the 3D space of Blender.
Fig. 60 Visual Manager in action
Within the Display mode section, users can filter the visualization of the geometries by using EM, Epochs, and Properties.
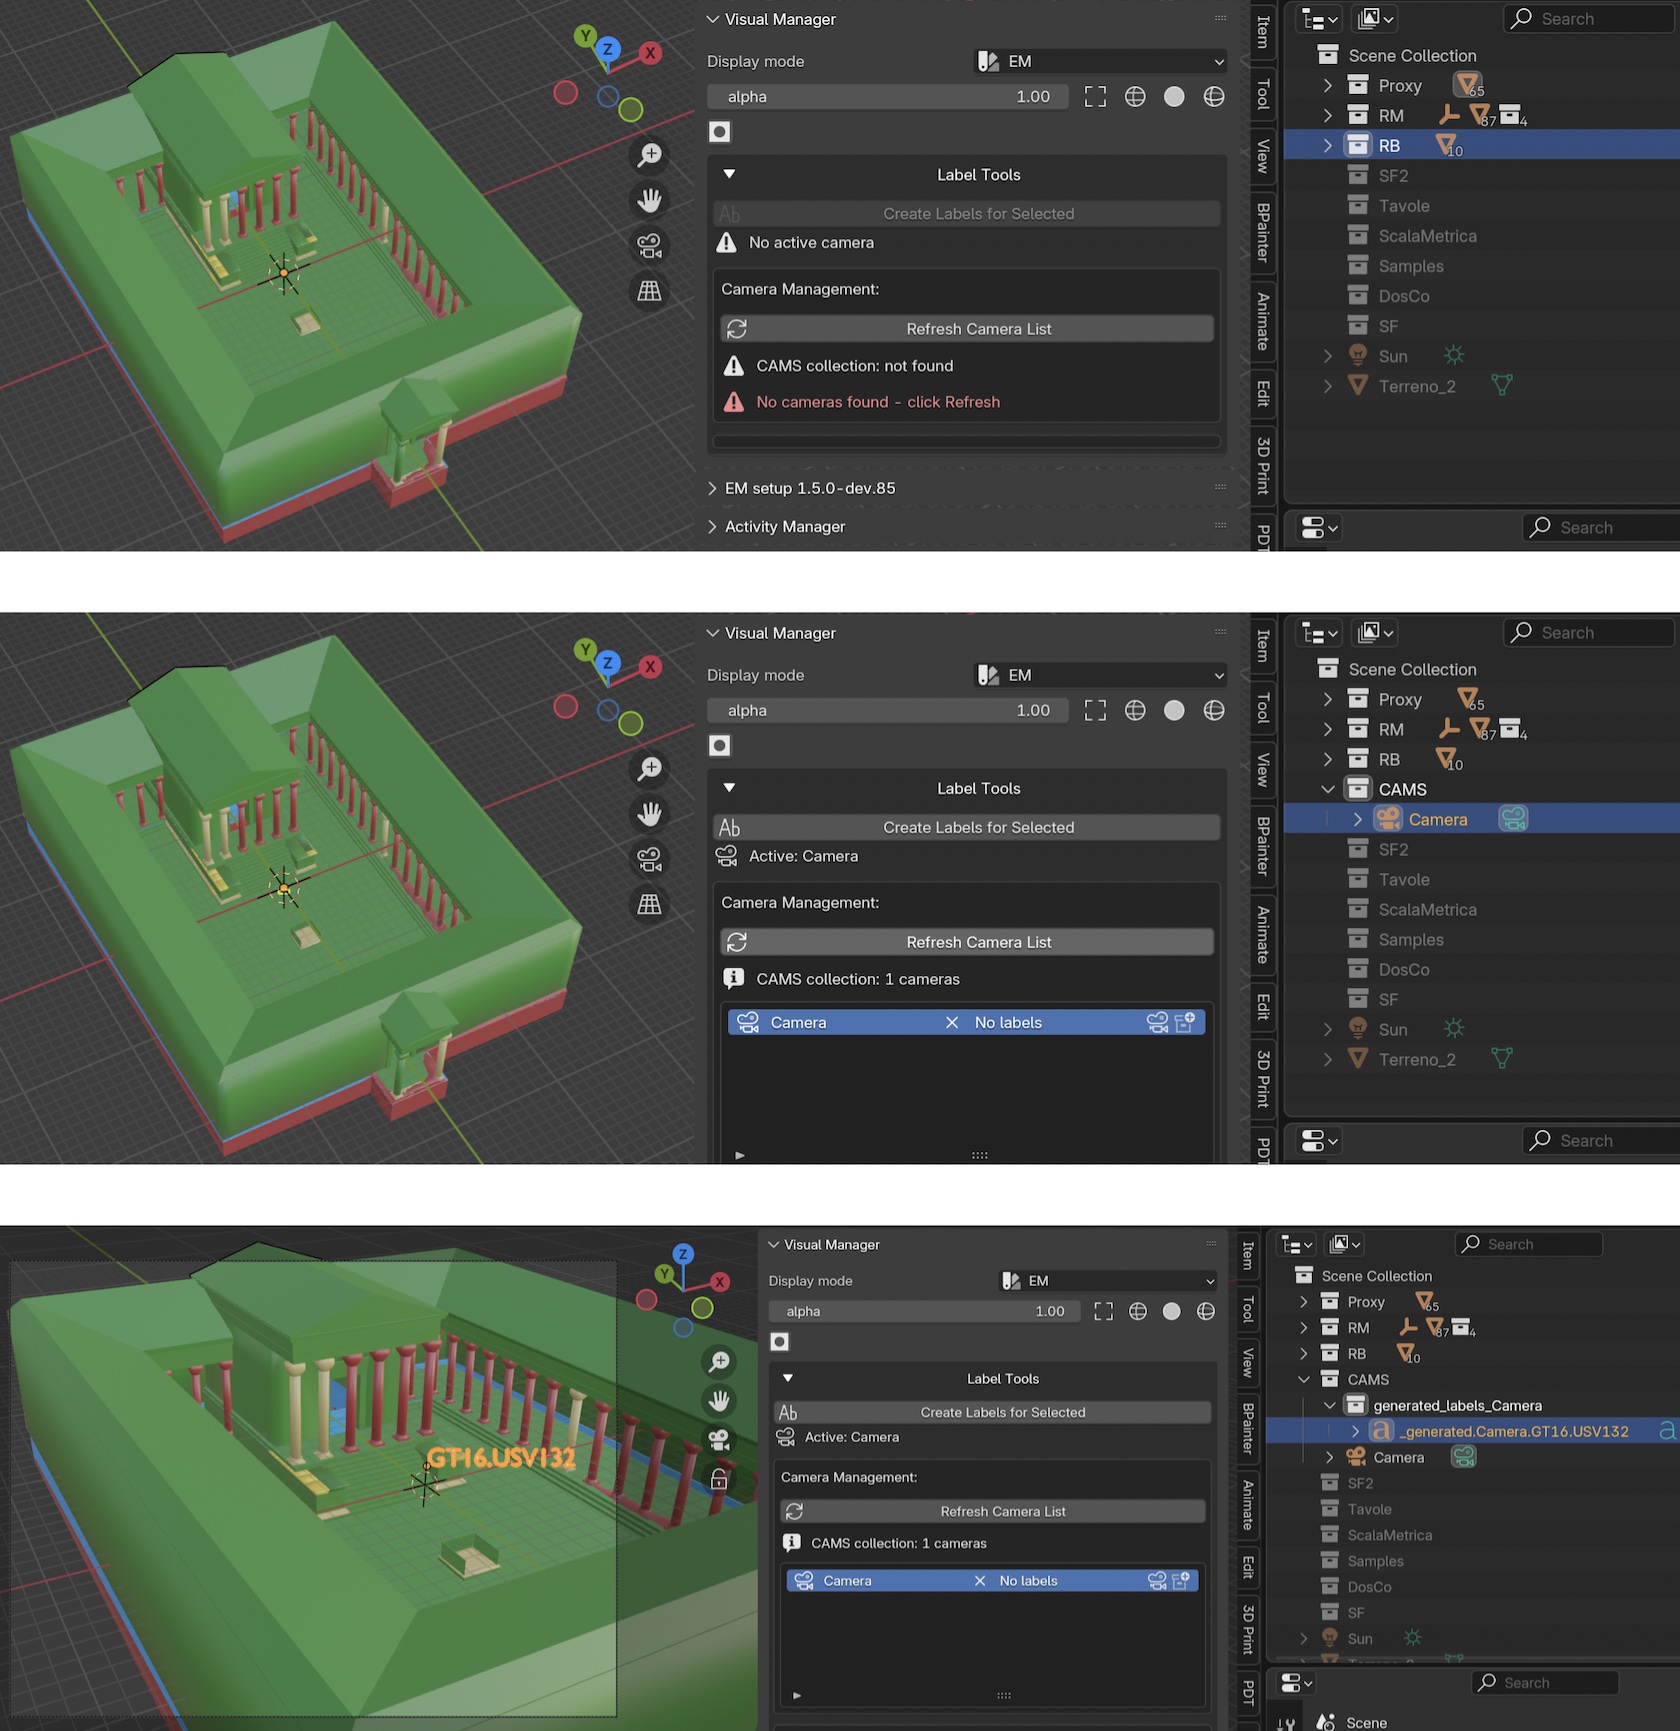
Fig. 61 Visual Manager EM-mode and the labeling workflow
EM will visualize Proxies with a monochromatic material that will match their node (US, USV/s, USV/n, SF, USD, serSU, serUSD, etc..; Fig. 61).
Within the panel (Fig. 61) user can also control the alpha value of the Proxies’ material (0 = completely transparent; 1 = no alpha).
Other display options allow user to visualize ONLY selected Proxies with different modes (bounding box, wireframe, solid, solid&wireframe).
The Label Tools section allows user to automatically create a label related to the selected proxies.
Firstly, to start the labelling process users must create the CAMS collection and move inside an already existing camera (or a new one), then by pressing the Refresh Camera List button the tool will automaticcally visualize the camera and display information.
Once the camera has been oriented (NB: in order to easily orient the camera on the desired proxy or Proxies, user has different solution: manual orientation, by using default command of Blender, or using the add-on Store View, which is already in Blender) and one or more Proxies has been selected, by pressing the Create Labels for Selected button a new label will appear.
Since labels will appear within the frame of the camera, NOT on top of the Proxies’ 3D surface, to visualise them user must enter on the Active camera view mode of Blender (Numpad 0 button).
User can also locate labels (as text objects) within the Outliner of Blender in the _generated_labels_Camera collection.
Once automatically generated, labels can be easily modified by applying the Grab, Scale, and Rotate commands of Blender. Labels will appear both on the viewport of Blender and on the rendered images.
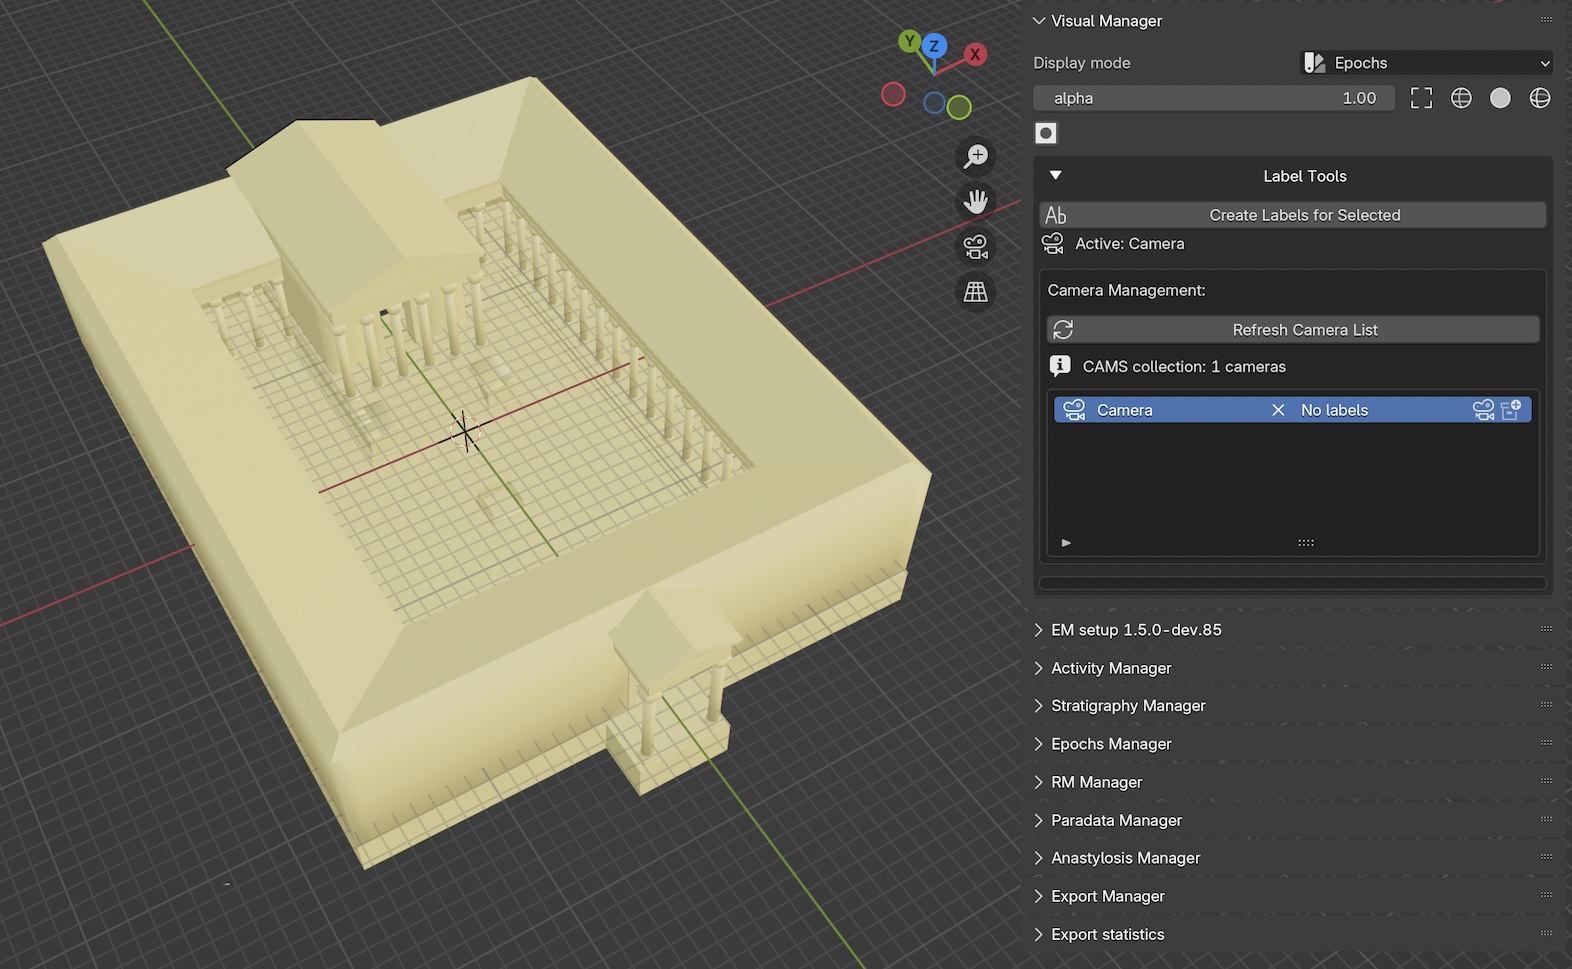
Fig. 62 Visual Manager Epochs-mode
Epochs change Proxies’ materials according to the chronological period to which proxy models belong (Fig. 62).
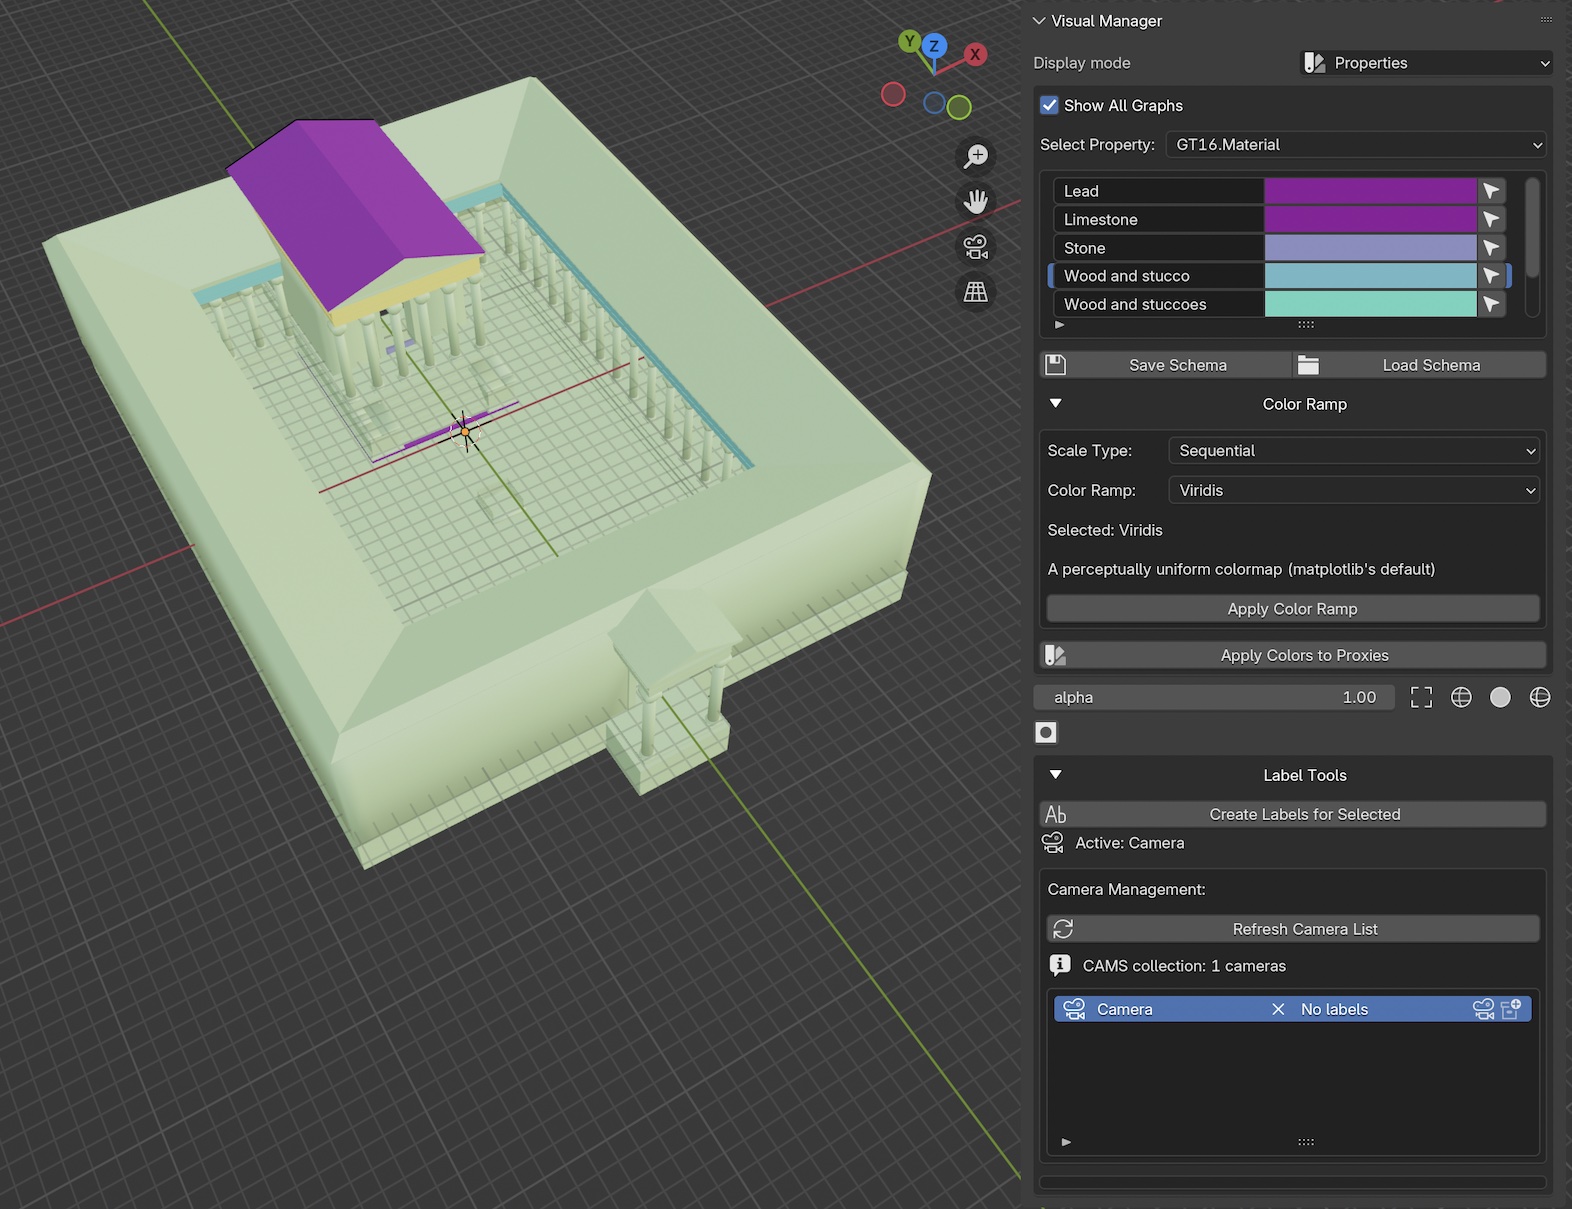
Fig. 63 Visual Manager Properties-mode
Properties apply a new material to every Proxy model (Fig. 63).
This specific section of the panel reads all the properties of the EM.
When a specific property is selected the filter visualizes all the related information.
The panel allows to:
freely attribute a color material
select Proxies with the same property
save the color schema
load a specific color schema
When Display mode is set to Properties a Color Ramp appears on the lower part of the Visual Manager panel.
The menu allows to set the Scale Type, with three option (Sequential, Diverging, and Qualitative), and the Color Ramp type (Viridis, Blues, Heat).
Everytime a Color Ramp is selected the line Selected will be automatically updated.
The Apply Color Ramp button consents to attribute and visualize the color ramp selected in the Property list.
When a color ramp is defined, by pressing the Apply Colors to Proxies button EMtools will automatically transfer colors to Proxies.
Display Controls
Below the display mode section, a row of controls is available:
Alpha slider: controls the transparency of the Proxies’ material (0 = fully transparent, 1 = fully opaque)
Shading buttons: switch between
Bounding Box,Wireframe,Solid, andSolid & Wireframedisplay modes for selected proxiesBulk visibility controls: four show/hide pairs that toggle every object of a given role — see Bulk Visibility Controls below
Material override button: applies a default material to objects not matched by the EM graph
Bulk Visibility Controls
On the right side of the Display Controls row, four pairs of icon buttons let you flip the visibility of every object in a given role in a single click. The pairs, left to right:
Proxies — show / hide every proxy mesh registered in the Stratigraphy Manager list.
Representation Models (RMs) — show / hide every RM mesh, curve and Cesium-tileset wrapper registered as an RM. Three sources are unioned: the RM Manager list, the legacy
RMBlender collection, and every RM Container (so a mesh that was added to a container before an active epoch was set still participates).Special Finds (SF) — show / hide every Special Find mesh in the
SFBlender collection.RMDocs — show / hide every RMDoc quad in the
RMDocBlender collection plus its associated camera, kept in lock-step so toggling never leaves a dangling camera visible without its quad.
Each button operates on all three of Blender’s visibility flags
simultaneously: the per-view-layer eye icon (the H key in the
viewport), the “Disable in Viewports” monitor icon, and the
“Disable in Renders” camera icon. This matters when you want to
recover models you previously hid via the eye icon — a single
“Show All” click flips every flag, so anything you hid through
any of Blender’s three mechanisms comes back. The same symmetry
applies on the Hide side.
Note
Changed in EM Tools 1.5.4 / 1.6.0-dev.7. Before this patch
the RM, SF, and RMDoc show/hide pairs touched only two of the
three visibility flags, so any object hidden via the H key
or the outliner eye icon stayed hidden after a “Show All”
click. The RM pair also iterated only the RM list and the
legacy RM collection — meshes that lived in an RM Container
without an rm_list entry were invisible to the operator.
Both shortcomings are now fixed; the four pairs behave
consistently.
Color Scheme Save/Load
When using the Properties display mode, color schemes can be saved and loaded:
Save Color Schemebutton: exports the current property-color mapping to a.emcfileLoad Color Schemebutton: imports a previously saved.emcfile and applies the colors to the property values list
Proxy Inflate Manager (Experimental)
Warning
This section is only visible when Experimental Features are enabled in the EM Data Tree panel.
See the Proxy Inflate Manager (Experimental) page for full documentation.