Creating Proxies and Exporting Your Dataset
Todo
Embed YouTube video — placeholder slug 18_em_proxy_export.
Once the recording is uploaded, replace this todo with a
.. raw:: html iframe pointing at the real YouTube video ID.
Working title: Creating Proxies and Exporting Your Dataset (~~4 min).
Prerequisites
Overview
The Proxy Box Creator places a proxy volume on a 3D object by recording two alignment points, measuring wall thickness and length, then generating the volume automatically. The Export Manager packages the full dataset — 3D models, graph nodes, image links, external URLs — as a portable ZIP.
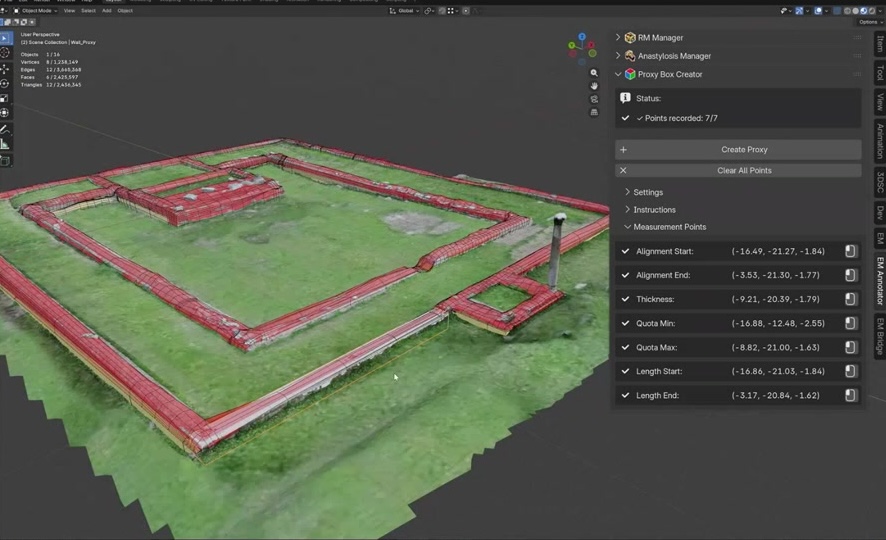
Fig. 39 The Proxy Box Creator panel in the Blender EM sidebar.
Key Concepts
Proxy Box Creator: place the 3D cursor, record two alignment points, generate volume.
The tool measures quota minimum/maximum, length, and wall thickness automatically.
Export Manager: select scene elements, set path, configure glTF compression options.
The ZIP contains all models, metadata, image links, and external URL references.
Screenshots
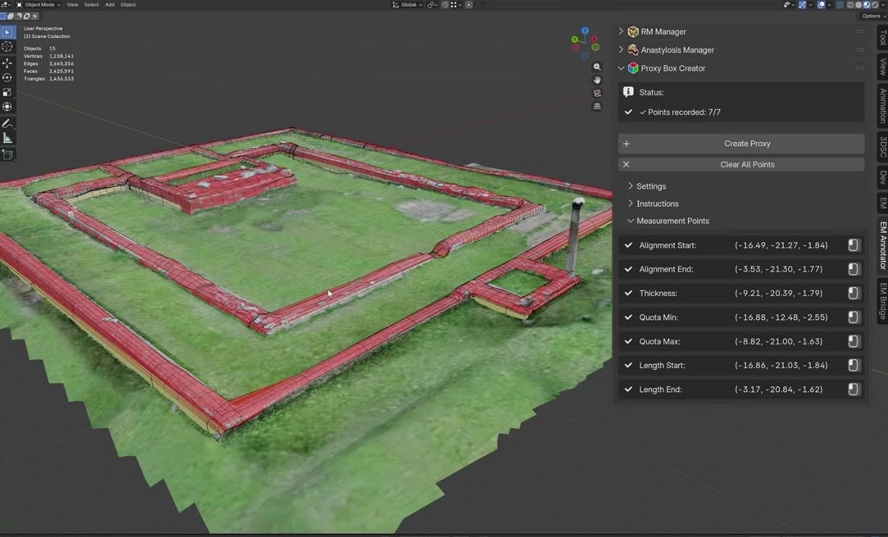
Fig. 40 Recording the first alignment point on the wall surface.

Fig. 41 Proxy volume automatically generated from the two alignment points.

Fig. 42 Export Manager panel: element selection and output path settings.

Fig. 43 Export result: ZIP archive containing models, metadata, and links.
Try It Yourself
Use the Proxy Box Creator on two walls in the playground dataset and export the scene as a ZIP archive.
Note
A video walkthrough for this tutorial will be available on the Extended Matrix YouTube channel.